Việc tối ưu hóa một webserver rất quan trọng, vì nếu chúng ta config tốt thì website của chúng ta có thể chạy nhanh hơn, mạnh hơn khi lượng truy cập lớn, và ít xảy ra các lỗi trong quá trình chạy.
Tối ưu apache:
Mở file /etc/httpd/conf/httpd.conf và thay đổi các giá trị sau:
01 Timeout 200
02 KeepAlive On
03 maxKeepAliveRequests 100
04 KeepAliveTimeout 3
05 MinSpareServers 10
06 MaxSpareServers 20
07 StartServers 15
08 MaxClients 250
09 MaxRequestsPerChild 0
10 HostnameLookups Off
Tối ưu hóa php:
Để tối ưu hóa php thì ta có thể cài eAccelerator để tăng tốc độ xử lý cho php.
Đầu tiên vào trang chủ của eAccelerator để download phiên bản mới nhất về. Giải nén và di chuyển đến thư mục đó.
Và sau đó gõ các lệnh sau:
1 phpize
2 ./configure
3 make
và tiến hành cài đặt eAccelerator :
1 make install
Tiếp theo chúng ta sẽ mỡ file php.ini ( thường ở /etc/php.ini ) và chèn đoạn mã sau vào cuối dòng:
01 extension="eaccelerator.so"
02 eaccelerator.shm_size="16"
03 eaccelerator.cache_dir="/tmp/eaccelerator"
04 eaccelerator.enable="1"
05 eaccelerator.optimizer="1"
06 eaccelerator.check_mtime="1"
07 eaccelerator.debug="0"
08 eaccelerator.filter=""
09 eaccelerator.shm_max="0"
10 eaccelerator.shm_ttl="0"
11 eaccelerator.shm_prune_period="0"
12 eaccelerator.shm_only="0"
13 eaccelerator.compress="1"
14 eaccelerator.compress_level="9"
Bước cuối cùng là tạo thư mục cache cho eAccelerator:
1 mkdir /tmp/eaccelerator
2 chmod 0777 /tmp/eaccelerator
Kiểm tra xem eAccelerator đã hoạt động chưa. Ta gõ php -v, nếu thấy xuất hiện:
1 PHP 5.2.6 (cli) (built: May 5 2008 10:32:59)
2 Copyright (c) 1997-2008 The PHP Group
3 Zend Engine v2.2.0, Copyright (c) 1998-2008 Zend Technologies
4 with eAccelerator v0.9.5.3, Copyright (c) 2004-2006 eAccelerator, by eAccelerator
nghĩa là eAccelerator đang hoạt động
Tối ưu hóa mysql:
Mở file my.cnf và chèn vào đoạn code sau:
01 [mysqld]
02 max_connections = 400
03 key_buffer = 16M
04 myisam_sort_buffer_size = 32M
05 join_buffer_size = 1M
06 read_buffer_size = 1M
07 sort_buffer_size = 2M
08 table_cache = 1024
09 thread_cache_size = 286
10 interactive_timeout = 25
11 wait_timeout = 1000
12 connect_timeout = 10
13 max_allowed_packet = 16M
14 max_connect_errors = 10
15 query_cache_limit = 1M
16 query_cache_size = 16M
17 query_cache_type = 1
18 tmp_table_size = 16M
19 skip-innodb
20
21 [mysqld_safe]
22 open_files_limit = 8192
23
24 [mysqldump]
25 quick
26 max_allowed_packet = 16M
27
28 [myisamchk]
29 key_buffer = 32M
30 sort_buffer = 32M
31 read_buffer = 16M
32 write_buffer = 16M
Thứ Năm, 16 tháng 9, 2010
Hướng dẫn cài đặt cPanel/WHM
Để cài đặt cPanel/WHM cho VPS hay Máy chủ rất đơn giản, bạn có thể làm theo các bước sau.
1. Chuẩn bị:
- Máy chủ hoặc VPS đã kết nối mạng
- Đã cài đặt perl, gcc trên VPS hay Máy chủ: yum -y install perl gcc
2. Chú ý:
cPanel là chương trình quản lý hosting khá nặng, do đó cấu hình máy chủ (hay VPS) cần tối thiếu cấu hình sau:
Pentium hay AMD chipset 266 MHz
256 MB RAM (nên từ 1GB RAM trở lên)
Ít nhất 10GB ổ cứng
Nên sử dụng CentOS hoặc RHEL (Redhat Enterprise Linux)
3. Cài đặt: Sau khi login SSH bằng Putty hoặc các chương trình SSH Client mà bạn sử dụng, thực hiện các bước sau:
Khi sử dụng lệnh "sh latest" hệ thống sẽ tự động cài đặt cPanel cho đến khi tiến trình hoàn tất (nếu không có lỗi trong quá trình cài đặt).
Sau khi quá trình cài đặt hoàn tất, bạn có thể đăng nhập vào WHM bằng cách sử dụng đường dẫn
http://[ip]:2086 hoặc https://[ip]:2087 để cấu hình.
If you are getting the following errors while updating cpanel ..
Checking Update System……..Your operating system’s rpm update method (yum) was not able to locate the glibc package. This is an indication of an improper setup. You must correct this error before you can proceed. Please correct the conflicts and try again!
To correct this problem, run the following commands:
*/yum check-update
[or]
* /bin/umount /var/tmp
* /scripts/securetmp
* /scripts/upcp –force <<<< important
* /scripts/easyapache
Thứ Tư, 15 tháng 9, 2010
Các bước cài đặt hệ điều hành CentOS 5
1. Cài đặt hệ thống centos cơ bản:
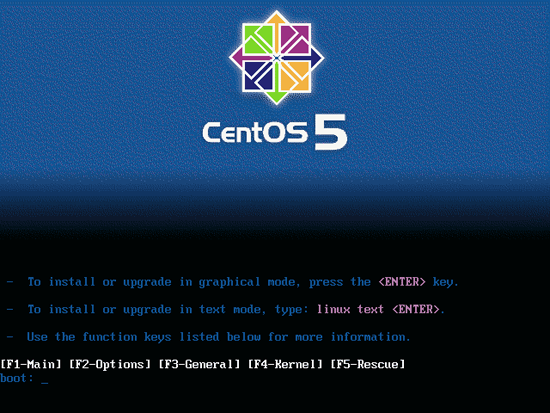
- Cho đĩa cài đặt của bạn và sử dụng quá trình boot từ CD-ROOM
Bạn ấn Enter để tiếp tục quá trình cài đặt ở chế độ đồ họa
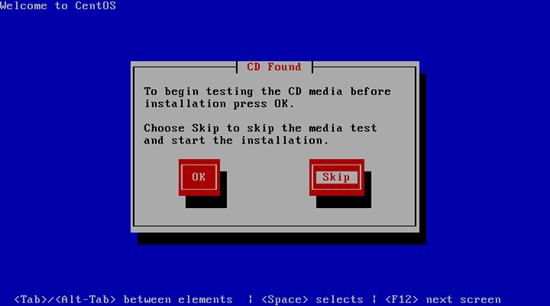
- Hệ thống sẽ yêu cầu bạn kiểm tra xem đĩa cài đặt có hoạt động tốt không
Nếu đĩa cài của bạn tốt chúng ta có thể bỏ qua quá trình kiểm tra
- Next tiếp tục quá trình cài đặt
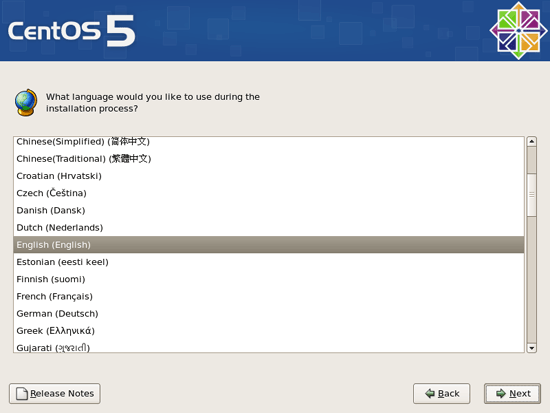
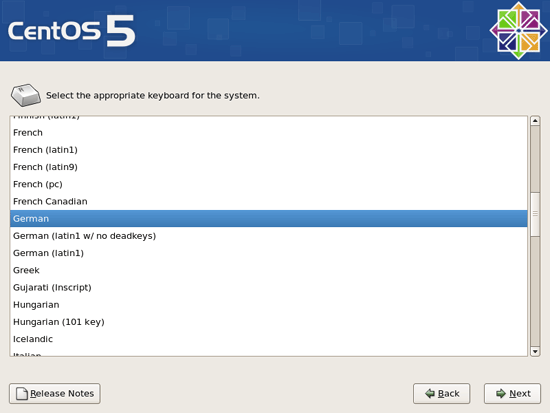
- Khâu tiếp theo là lựa chọn ngôn ngữ cho hệ thống
* CentOS5 đã hỗ trợ ngôn ngữ Tiếng Việt, ở đây mình lựa chọn Tiếng Anh
- Tiếp theo là lựa chọn kiểu bàn phím(Thông thường chúng ta sẽ lựa chọn bàn phím Tiếng Anh)
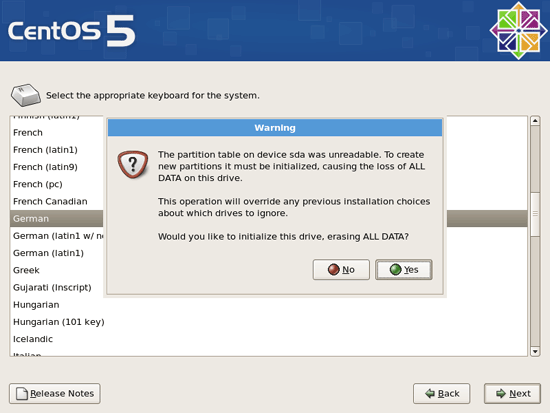
-Tiếp theo hệ thống sẽ đưa ra lựa chọn(Would you like to initialize this drive, erasing ALL DATA?), Ở đây mình cài đặt một hệ thống mới, lên mình chọn Yes
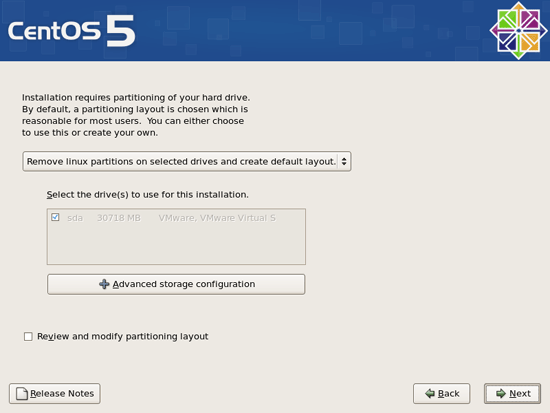
- Bước tiếp theo là lựa chọn cách thực chia phân vùng và định dạng file cho hệ thống, tôi khuyên các bạn khi cài đặt một hệ thống mới
và chưa có nhiều kinh nghiệm về cách phân vùng cho hệ thống Linux hãy chọn chế độ phân vùng tự động mà hệ thống đưa ra
(Remove linux partitions on selected drives and create default layout).
- Cho đĩa cài đặt của bạn và sử dụng quá trình boot từ CD-ROOM
Bạn ấn Enter để tiếp tục quá trình cài đặt ở chế độ đồ họa
- Hệ thống sẽ yêu cầu bạn kiểm tra xem đĩa cài đặt có hoạt động tốt không
Nếu đĩa cài của bạn tốt chúng ta có thể bỏ qua quá trình kiểm tra
- Next tiếp tục quá trình cài đặt
- Khâu tiếp theo là lựa chọn ngôn ngữ cho hệ thống
* CentOS5 đã hỗ trợ ngôn ngữ Tiếng Việt, ở đây mình lựa chọn Tiếng Anh
- Tiếp theo là lựa chọn kiểu bàn phím(Thông thường chúng ta sẽ lựa chọn bàn phím Tiếng Anh)
-Tiếp theo hệ thống sẽ đưa ra lựa chọn(Would you like to initialize this drive, erasing ALL DATA?), Ở đây mình cài đặt một hệ thống mới, lên mình chọn Yes
- Bước tiếp theo là lựa chọn cách thực chia phân vùng và định dạng file cho hệ thống, tôi khuyên các bạn khi cài đặt một hệ thống mới
và chưa có nhiều kinh nghiệm về cách phân vùng cho hệ thống Linux hãy chọn chế độ phân vùng tự động mà hệ thống đưa ra
(Remove linux partitions on selected drives and create default layout).
How to check infomation in Centos
*/check version
cat /etc/redhat-release for the CentOS version.
$ cat /etc/redhat-release
CentOS release 5 (Final)
*/check OS-bit
$ uname -a
Linux slave.DNS-HCM 2.6.9-42.ELsmp #1 SMP Tue Aug 15 10:35:26 BST 2006 x86_64 x86_64 x86_64 GNU/Linux
(64-bit)
# uname -a
Linux voice.localdomain 2.6.18-128.1.10.el5 #1 SMP Thu May 7 10:39:21 EDT 2009 i686 i686 i386 GNU/Linux
(32-bit)
"i686" means 32-bit. If it was 64-bit, it would be "x86_64"
*/service command - list running services
service --status-all
service --status-all | grep ntpd
service --status-all | less
*/Print the status of any service
To print the status of apache (httpd) service:
service httpd status
*/List all known services (configured via SysV)
chkconfig --list
*/List service and their open ports
netstat -tulpn
*/Turn on / off service
ntsysv
chkconfig service off
chkconfig service on
chkconfig httpd off
chkconfig ntpd on
*/check hardware information :
root@shell [~]# dmidecode | more
*/ check HDD
#df -h
*/ check Raid level
# cat /proc/mdstat
Personalities : [raid1]
md3 : active raid1 hdc1[1] hda1[0]
104320 blocks [2/2] [UU]
md1 : active raid1 hdc2[1] hda2[0]
61633280 blocks [2/2] [UU]
md2 : active raid1 hdc3[1] hda3[0]
8193024 blocks [2/2] [UU]
md4 : active raid1 hdc6[1] hda6[0]
1020032 blocks [2/2] [UU]
md0 : active raid1 hdc5[1] hda5[0]
5116544 blocks [2/2] [UU]
unused devices:
In this scenario, it shows that md had raid 1 installed.
# mdadm -D /dev/md0
/dev/md0:
Version : 00.90.01
Creation Time : Thu Jun 28 16:43:40 2007
Raid Level : raid1
Array Size : 5116544 (4.88 GiB 5.24 GB)
Device Size : 5116544 (4.88 GiB 5.24 GB)
Raid Devices : 2
Total Devices : 2
Preferred Minor : 0
Persistence : Superblock is persistent
Update Time : Wed Sep 15 18:43:06 2010
State : clean
Active Devices : 2
Working Devices : 2
Failed Devices : 0
Spare Devices : 0
Number Major Minor RaidDevice State
0 3 5 0 active sync /dev/hda5
1 22 5 1 active sync /dev/hdc5
UUID : 506b9927:274e5bca:a1aa0988:48c7ded4
Events : 0.7769115
Rewrite url in php!
Tuesday, 9. December 2008, 02:09:22
Iam using Apache. I want to rewrite url.
In url it will display: http://localhost/Ying/getrewrite/1/2.
But it redirect to: http://localhost/Ying/getrewrite.php?id=1&page=2
In url it will display: http://localhost/Ying/getrewrite/1/2.
But it redirect to: http://localhost/Ying/getrewrite.php?id=1&page=2
Step 1: Configure:
- Go /etc/httpd/conf and we configure for httpd.conf.
- Open file httpd.conf:
You find line: LoadModule rewrite_module modules/mod_rewrite.so --> delete "#" in head line to use this service.
Find line: Change AllowOverride None --> AllowOverride All.
  Options FollowSymLinks
  AllowOverride None
Step 2: We have 3 files and same directory:
- .htaccess (purpose: redirect virtual dir into real dir): To create this file, first open notepad, then create filename="" and extendsion: htaccess.
- rewrite.php (purpose: display link, call file getrewrite.php).
- getrewrite.php (file will be redirected).
Step 3: Content of our file:
- .htaccess:
RewriteEngine On
RewriteBase /

RewriteCond %{REQUEST_FILENAME} !-f
RewriteCond %{REQUEST_FILENAME} !-d

RewriteRule ^getrewrite/(.*)/(.*)$ Ying/getrewrite.php?id=$1&page=$2 [L]
Explain:
Line 1: RewriteEngine On
Line 3-4: Two lines will create requirement to server check path which user use really or not, before access it as virtual path. -d and -s are 2 sample values for checking REAL DIRECTORY and FILE. Use [OR] make it 2 in 1.
Line 5: Redirect real file. Syntax: RewriteRule Virtual_Dir Real_Dir
+ Syntax Virtual_Dir:
^ --> begin.
$ --> end.
getrewrite/(.*)/(.*) --> virtual_dir.
+ Syntax Real_Dir:
alias/filename.php?id=$1&page=$2
+ [L] --> set virtual_dir in url.
- rewrite.php:
href="getrewrite/1/2">url
- getrewrite.php:
echo "id: ".$_REQUEST["id"];
echo "page". $_REQUEST["page"];
Then now, you finish your rewrite url. Good luck!
Đăng ký:
Bài đăng (Atom)